If you have ever used Windows, you know that Snipping Tool is a very common phrase used among windows users. But in case you are a Mac user who recently moved to the Apple ecosystem, you might wonder how you can do the snipping on an Apple computer. If that’s the case, then you are in the right place.

If you are totally unaware of Snipping Tool, then it’s a built-in tool that lets you take snapshots of the current screen or even a small portion of the screen and then share or even save it. We will talk about how this snipping works in the macOS.
How to take screenshots on Mac using the snipping tool?
I’m assuming you already have a Mac Computer and I’m using the latest macOS iteration called Ventura. So, in case your computer has an earlier version of the operating system, the screenshots might vary a little but it certainly shouldn’t be difficult for you to follow.
See Also: How can you use your iPad to take a screenshot?
Also, macOS allows you to take screenshots of the entire screen, only a certain window/app, or just a portion of the screen that you can select by yourself.
- If you want to take a snapshot of the entire screen, Press and hold these Shift, Command, and Number 4 keys together. This will instantly take a screenshot of the entire screen and save it on the Desktop as an image. From there you can choose to do whatever you want with it.
- Now, if you want to take a snapshot of a certain window/app, Press and hold the Shift, Command, Number 4, and Space bar keys together. If you have done that right, then the mouse pointer will change to a camera icon.
- Then, all you have to do is place the mouse over the window from which you want to take a snapshot and click over it. A snapshot will be saved in your Desktop folder. One thing to remember is to ensure that the window is clearly visible on the screen.
- In case you want to capture only a portion of the screen, Press and hold the Shift, Command, and Number 4 keys together. Now, the mouse pointer will change to a crosshair icon.
- Select the area of the screen which needs to be captured and as soon as you release the mouse click, the selected portion will be saved as an image in the Desktop folder.
That’s how easy it is to use the snipping tool on your Mac Computer.
A Few Things to Know
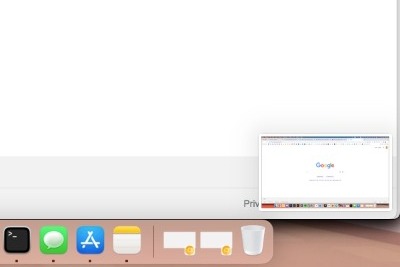
Before saving it in the desktop folder, you will see a thumbnail of the image at the bottom right corner of the screen for a few seconds. If you want to make any changes to the image, you can click on it and edit it or else choose to save it like it is.

See Also: Are Apple Watches waterproof? Everything you need to know
The screenshots will be saved on your Desktop by default with the name “Screen Shot [date] at [time].png“.
For macOS Mojave or later, you have the option to change this default folder using the Screenshots app.
When I started using macOS back in 2015, I was able to see how easy it was to take a screenshot. Back then snipping tool was not very easy to use in Windows because it was required to open the snipping tool first and then take a snapshot. But now, with windows 10 or later, there is a shortcut key Windows logo key + Shift + S to easily take a screenshot.
Do you think it’s easier to take a snip of the screen on a Mac? Do let us know in the comments below.

